For many years, integrating PayPal meant one thing: adding a “PayPal Checkout” button. If you’ve been in the e-commerce space for a while, you likely remember the days of WPS (Web Payments Standard) or the NVP/SOAP (Classic) APIs. While these served us well, they were largely limited to PayPal-branded payments.
Today, the landscape has changed. Merchants need to offer a variety of payment methods—from credit cards and digital wallets to local payment schemes—without managing dozens of different integrations.
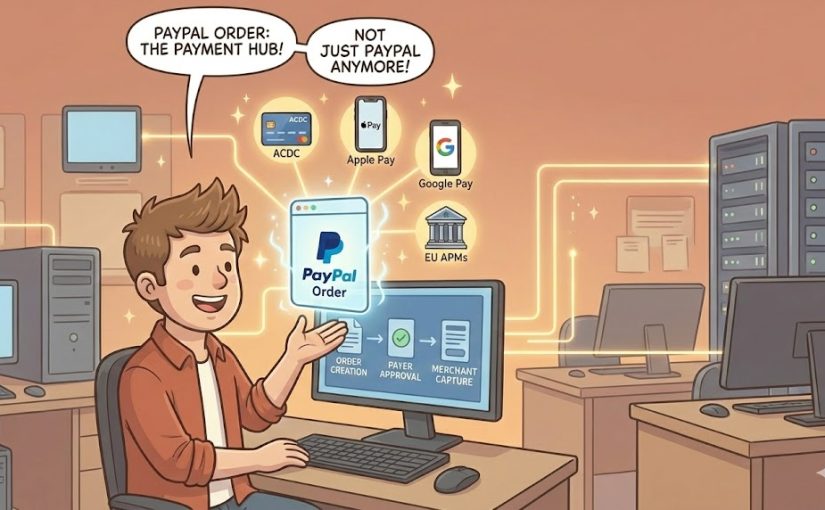
Enter the PayPal REST API and the concept of the PayPal Order. It is no longer just a way to pay with PayPal; it is a powerful, unified container for almost any way your customer wants to pay.
The Evolution: From Legacy to REST
If you are still relying on legacy NVP/SOAP integrations, you are missing out on the flexibility of the modern web. Legacy integrations were built primarily for PayPal-to-PayPal transactions.
By moving to the PayPal REST API, you unlock a “Single Integration” capability. This means the same technical foundation used for a standard PayPal button also powers:
- ACDC (Advanced Credit and Debit Cards): Direct card entry on your site.
- Digital Wallets: Apple Pay and Google Pay.
- APMs (Alternative Payment Methods): Crucial for EU regions, such as iDEAL, Bancontact, and Sofort.
What exactly is a PayPal “Order”?
At the center of this ecosystem is the Order. Think of a PayPal Order as a secure container for a payment request. It doesn’t just represent a “PayPal transaction”; it describes the intent of a transaction.
When you create an order via the API, you are defining:
- The Amount: The currency and breakdown of the cost.
- The Experience: How the checkout should look and feel.
- The Payer’s Intent: It holds the payer’s consent once they “approve” the payment using their chosen instrument (PayPal balance, a credit card, or a digital wallet).
Whether your customer is using Apple Pay or their PayPal account, the process always starts with the creation of a PayPal Order to hold these details.
The Lifecycle: Approval vs. Capture
One of the most important concepts for developers to understand is that Approval is not the same as Payment.
The workflow generally follows these steps:
- Create Order: You define the payment details.
- Payer Approval: The customer gives consent. This can be handled via the JavaScript SDK
onApprove()callback, a redirect to areturn_url, or monitored via theCHECKOUT.ORDER.APPROVEDwebhook. - Capture: This is the final step. The merchant must explicitly call the “Capture” API to actually move the funds.
Warning: Just because an order is “Approved” doesn’t mean the money is in your account. A capture attempt can still fail. For instance, PayPal’s Risk Engine might flag the transaction.
As a developer, you must handle the response of the Capture call:
- 200 OK with Status
COMPLETED: Success! The funds are secured. - 422 Unprocessable Entity: This indicates an issue with the capture (e.g., instrument declined or risk triggered). Your integration should be prepared to handle these errors gracefully.
Persistence and Best Practices
It is important to note that a PayPal Order is ephemeral. It lives in a cache and will expire after a certain period if not captured. Once an order is successfully captured, the data persists as a permanent transaction record.
For better reconciliation and customer support, merchants are strongly advised to store the following in their own database:
- PayPal Order ID: The initial container ID.
- Capture ID / Authorization ID: The actual transaction identifier for the movement of funds.
- Refund IDs: Associated with any subsequent return of funds.
The Order ID acts as the “parent” that links all these associated transaction pieces together, making it much easier to track the lifecycle of a purchase.
Ready to Upgrade?
The shift from “just a button” to a comprehensive “Order-based” system allows you to scale your business globally with minimal code changes. By mastering the PayPal Order, you provide your customers with the payment methods they trust while maintaining a clean, unified backend.
For deep dives into integration snippets and full API references, head over to the PayPal Developer Portal.


